How to Clean Mac Caches Safely in 2026 (Without Breaking Apps)
BundleHunt Mac Optimization Team·Published May 16, 2026·Updated May 17, 2026
// 10-second answer
Mac caches live in four layers: user (`~/Library/Caches/`), system (`/Library/Caches/`), sandboxed containers, and browser. Each layer requires a different approach — inspect first, quit the app, then delete selectively. Layer 3 — sandboxed containers — is the most tedious manually because cleanup requires knowing each app's bundle ID. Never touch `/System/Library/Caches/` — that contains kernel extension caches that can cause boot issues.
Is `~/Library/Caches/` large enough to matter compared with your remaining free space?
Do you want to clean sandboxed app caches (Slack, Telegram, Discord) without Terminal?
Do you want cleanup to happen on a schedule without running commands monthly?
Is an app misbehaving and you've been told to "clear its cache"?
1+ yes → follow the layer-by-layer guide below · 0 yes → cache cleanup is not your storage problem
macOS stores caches in four separate locations and treats each differently. The right approach for each layer is: inspect first, quit the relevant app, then delete selectively. Do not wipe entire directories without identifying what they contain. /System/Library/Caches/ — particularly subdirectories like com.apple.kext.caches — contains kernel extension indexes macOS needs to boot and must never be deleted.
Most apps rebuild their cache data on next launch after a targeted deletion. You may notice a brief slowdown the first time you open a cleaned app — that's normal and temporary. Your logins, documents, preferences, and app purchases are stored separately and are not affected by cache cleanup.
Disclosure: BundleHunt sells MacCleanse (Koingo), DMcleaner (Donemax), and AweCleaner (Magoshare) and earns a commission on each. Free Terminal alternatives are listed in every section.
Do not delete
These locations must not be touched under any circumstances:
/System/Library/ — contains macOS system files, kernel extension caches, and infrastructure required for booting. Deleting anything here can cause startup failures that require macOS reinstallation to fix.
Random contents of app containers — ~/Library/Containers/<bundle-id>/ holds more than just caches. The Data/Library/Caches/ subfolder is the only safe target. Never delete the container root or its Data/Documents/, Data/Library/Application Support/, or Data/Library/Preferences/ subfolders.
Folders you cannot identify — if you do not recognize what a folder is for, do not delete it. Use du -sh <path> to check size and search the folder name online before acting. When in doubt, leave it.
Layer 1 — user caches
The user cache layer is the first safe place to inspect because it is inside your account and easy to review. Quit apps first, review the biggest folders, and delete only after you understand what will rebuild.
# See current size
du -sh ~/Library/Caches/

# List the biggest cache directories
du -h -d 1 ~/Library/Caches/ | sort -hr | head -20

# After review, quit the matching app and move that app's cache folder to Trash in Finder
open ~/Library/Caches

# Confirm the folder is smaller
du -sh ~/Library/Caches/
What lives here: Spotify track cache, browser caches for non-sandboxed browsers, IDE indices, font caches, image thumbnail caches. Most of it is disposable performance data, but offline media, local previews, and rebuildable indexes can be inconvenient to lose. Quit apps and review the largest folders before deleting.
This layer can be small or surprisingly large depending on browsers, media apps, chat apps, IDEs, and how recently those apps rebuilt their caches. Measure it before deciding whether it is worth cleaning.
Layer 2 — system caches
System caches require `sudo`, so the bar is higher. Only touch `/Library/Caches/` for a specific symptom, and leave `/System/Library/Caches/` alone.
# See size
sudo du -sh /Library/Caches/

# List the largest system cache folders before touching anything
sudo du -h -d 1 /Library/Caches 2>/dev/null | sort -hr | head -20

# List user-level logs while you're here
du -h -d 1 ~/Library/Logs 2>/dev/null | sort -hr | head -20

# List system logs
sudo du -h -d 1 /Library/Logs 2>/dev/null | sort -hr | head -20
The critical distinction: /Library/Caches/ holds third-party app system-level caches — some folders here can be cleared for specific troubleshooting, but avoid broad deletion of this directory. /System/Library/Caches/ contains macOS kernel and system infrastructure — do not delete. The path difference is one directory level.
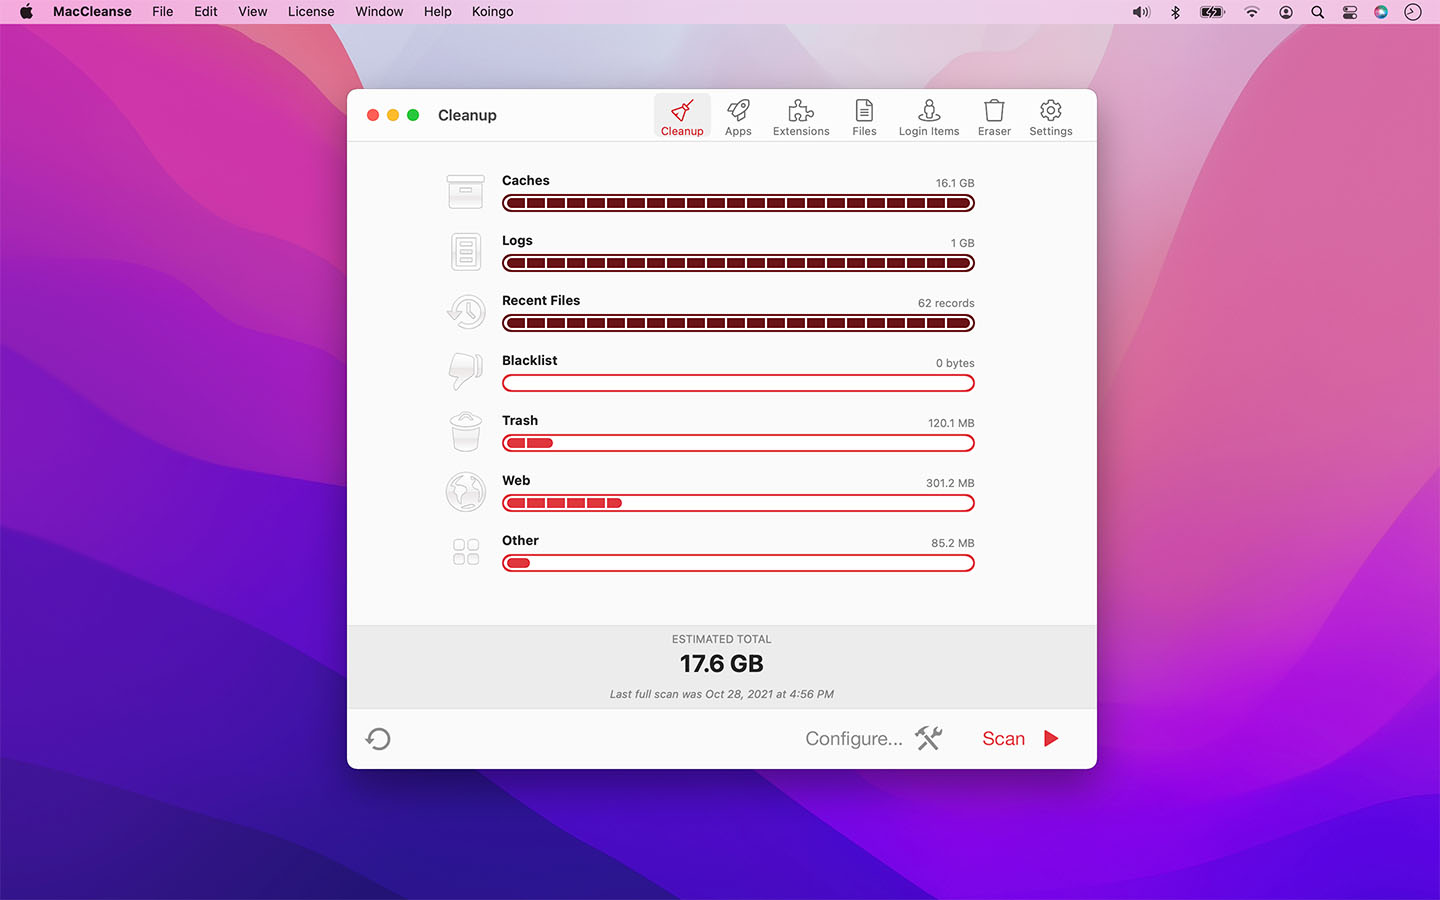
Manually knowing which paths are safe versus which to skip is the part that creates hesitation. MacCleanse presents every cache category as a labeled checkbox with the path and size, so you can skip the kernel-adjacent directories with confidence.
MacCleanse on BundleHunt (Koingo) shows a per-category preview — user caches, system caches, sandboxed containers, browser caches, privacy traces — each with a size and a checkbox. You uncheck anything you want to keep and click Clean. No need to memorize which paths are safe.
Good for: users who want to clean all four cache layers with a preview before deletion, anyone who finds the "do not touch /System/Library/" distinction stressful to remember, and users who want to selectively skip specific app caches.
Not for: users who are comfortable with the Terminal commands above and don't want to pay for a GUI — the free path covers the same ground.
Full feature list
Per-category checkboxes covering user caches, system caches, sandboxed app containers, browser data, privacy traces, app uninstall leftovers. File-level preview before deletion. Disk usage overview. No background scheduler — manual-launch only.
Disclosure: BundleHunt sells this; we earn a commission.
Layer 3 — sandboxed container caches
Every Mac App Store app and most modern apps store their cache inside a container identified by a bundle ID rather than an app name. This layer is often the largest on Macs with heavy chat app usage, and it is where the free path gets tedious.
You have to know the bundle ID for each app. Common examples:
# Slack
du -sh ~/Library/Containers/com.tinyspeck.slackmacgap/Data/Library/Caches/

# Telegram
du -sh ~/Library/Containers/ru.keepcoder.Telegram/Data/Library/Caches/

# Discord
du -sh ~/Library/Containers/com.hnc.Discord/Data/Library/Caches/

# WhatsApp
du -sh ~/Library/Containers/net.whatsapp.WhatsApp/Data/Library/Caches/
Inspect-first workflow (recommended):
# Step 1 — list all container cache folders, biggest first
find ~/Library/Containers -type d -name "Caches" -maxdepth 4 \
  -exec du -sh {} \; 2>/dev/null | sort -hr | head -20

# Step 2 — once you identify an app by its bundle ID, quit the app in macOS,
# then move only that app's cache folder to Trash via Finder:
open ~/Library/Containers/<bundle-id>/Data/Library/Caches/

# Step 3 — reopen the app and verify it works correctly
# Step 4 — restore from Trash if anything breaks (empty Trash only after confirming)
Do not use a mass-delete command on all container caches at once. Some app containers hold data that is slow or costly to re-download (offline media, sync state). Clean one app at a time after identifying it by name.
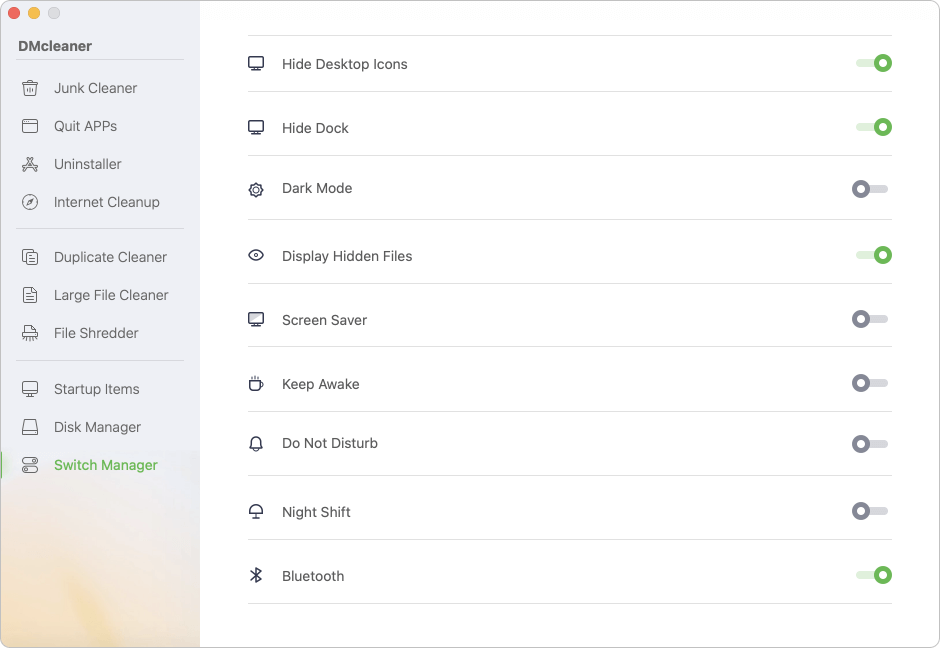
The problem with the Terminal approach is that you can't selectively clean "Slack but not Telegram" without knowing both bundle IDs. DMcleaner translates those cryptic identifiers to app names and lets you pick which containers to clean.
DMcleaner on BundleHunt (Donemax) is positioned as a cleaner that groups cache and cleanup tasks into a visual interface. Its practical value is selectivity: review one app's cache without mass-deleting every container cache on the Mac.
Good for: users with multiple large sandboxed apps (Slack, Zoom, Teams, Discord) who want to clean them selectively, anyone who wants the combined cache + large-file + duplicate + uninstaller workflow in one tool.
Not for: users who only need Layer 1 and 2 cleanup — the free Terminal commands handle those, and DMcleaner's full suite is more than you need for basic cache cleanup.
Full feature list
Vendor-stated capability areas include cache scanning, large-file review, duplicate finding, app-uninstall cleanup, and startup-item management. Confirm the current module list on the deal/vendor page before purchase.
Disclosure: BundleHunt sells this; we earn a commission.
Layer 4 — browser caches
Each browser stores its cache separately. The safest approach for most users is to clear browser cache through the browser's own Privacy settings — it keeps saved logins and extensions intact.
Via the browser (recommended — keeps cookies and logins):
Safari: Develop > Empty Caches (enable Develop menu in Safari Settings > Advanced first)
Chrome / Brave: Settings > Privacy > Clear Browsing Data > select "Cached images and files" only
Firefox: Settings > Privacy & Security > Cookies and Site Data > Clear Data > select "Cached Web Content" only
Browser caches vary widely in size depending on browsing habits and how long the browser has been running without being cleared.
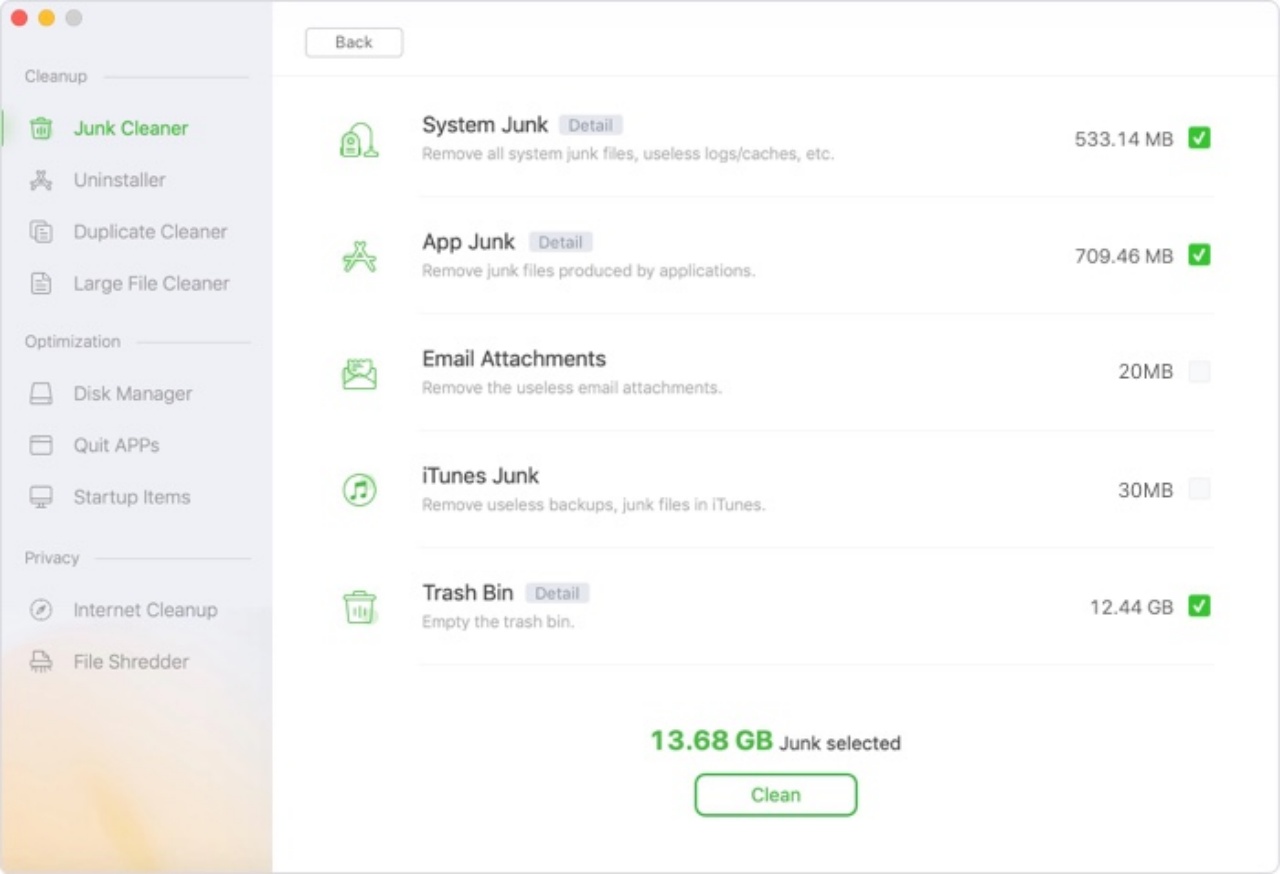
For a one-click cleaner, AweCleaner is positioned around scanning common cache and junk categories in one interface rather than making you choose browser-specific Terminal commands.
AweCleaner on BundleHunt (Magoshare) scans user caches, system caches, browser caches, and junk files in a single pass and presents them in one cleanup list. Click Scan, click Clean — no layer-by-layer commands needed.
Good for: users who want to clean all four cache layers without running Terminal at all, anyone who wants the simplest possible entry point to cache cleanup without configuring anything.
Not for: users who want per-category granularity or selective sandboxed app cleanup — AweCleaner is a one-button cleaner, not a selective one.
Full feature list
Single-scan junk file detection across user caches, system caches, browser caches, and logs. Disk usage overview. Large file finder. Single "Clean" action covers all detected junk. Minimal configuration.
Disclosure: BundleHunt sells this; we earn a commission.
When paid tools earn their keep
The free Terminal path covers most cache cleanup scenarios. Paid tools earn their cost in three specific situations — not as a general upgrade.
Three situations where a paid cleaner genuinely saves time compared to Terminal:
Sandboxed container caches with friendly app names — Terminal shows bundle IDs; a cleaner can present app names and sizes in a reviewable interface.
Scheduled or repeated cleanup — if you repeat the same review monthly, a tool can reduce the friction of remembering paths and commands.
Combined workflow — if you also need app-uninstall leftover cleanup and a large-file finder, one reviewed tool may be easier than several manual workflows.
If none of those three describe you, the Terminal commands in each layer above are enough. Don't buy a cleaner for cleanup you'll do once or twice a year.
For the full cleaner comparison — including Mac PowerSuite and DMcleaner — see Best Mac Cleaner Apps 2026.
Verify total recovered
Run df -h / before and after for an exact count. Total recovery varies widely depending on how long since the last cleanup and which apps you use heavily.
# Before and after free-space check
df -h /
Layer 1 is the easiest place to inspect first. Layer 3 is worth checking on Macs with heavy chat or collaboration-app usage. Results vary widely — use the du commands in each section to measure your specific machine before deleting anything.